|
|
|
|
News The Project Technology RoboSpatium Contribute Subject index Download Responses Games Gadgets Contact <<< EDM: Electronics (1) EDM: Wagners Hammer (2) >>> EDM: Engraving metals with "Wagners Hammer"The video about engraving with Wagners HammerWagners Hammer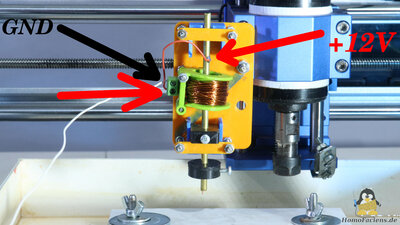
The design is quite simple and essentially consists of an electromagnet and a breaker switch. The electromagnet pulls the hammer inward as soon as a current flows through the coil. If that current is interrupted, the hammer falls back down. The trick is to let the current through the coil flow via this hammer so that it acts as a breaker switch for the coil. 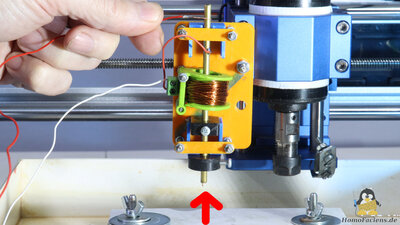
If voltage is now applied to the hammer, the electromagnet is activated. 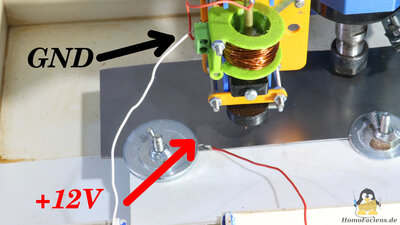
The workpiece to be machined acts as one contact of a switch with the tip of the hammer being the second. If the hammer has fallen down, the circuit is closed and the electromagnet is energized. This pulls the hammer upwards but immediately interrupts the flow of electricity. Without power, the hammer falls back down until contact is finally made with the workpiece and the process begins again. 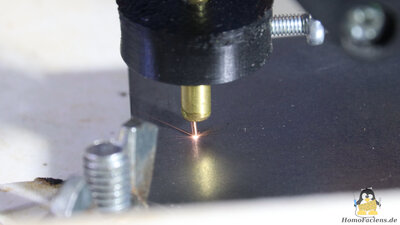
The Wagner hammer is attached to the Z-axis of a CNC machine. If this is now slowly lowered, at some point the tip of the wire touches the workpiece and the described cycle of Wagner's hammer begins. The processes take place quite quickly, so that opening and closing occurs at a frequency that is too high to be observed with your eyes. However, you can see the sparks that form when the brass tube is pulled upwards and the plasma bridges the resulting gap until the distance becomes too large and the circuit is finally interrupted. Version 1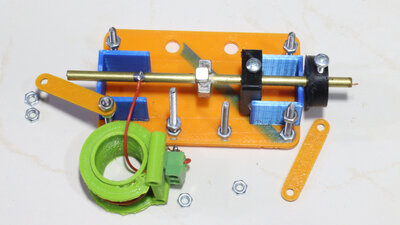
My first implementation of this principle consists of a 3D printed core onto which 100 turns of 0.35mm enameled copper wire was wound. A guide for a 4mm brass tube is integrated into the frame. 4 cube-shaped magnets are glued to the brass tube, all with their north poles pointing upwards. 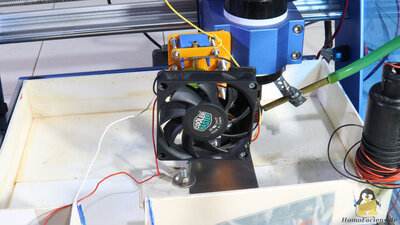
Over time, the electromagnet heats up so much that the PET plastic in my first experimental setup melted. As a quick solution, I installed a fan. Version 2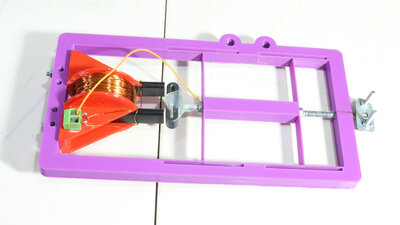
In the second version of my Wagner hammer I use a compliant mechanism to guide the tool: With this, movement along an axis is enabled by bending parts of the structure, theoretically eliminating any backlash. At the lower end of the threaded rod there is a tool holder for various electrodes. 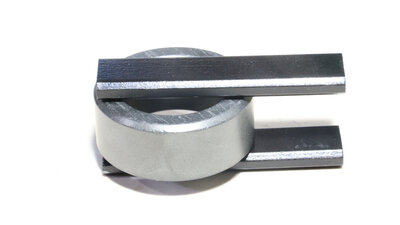
The electromagnet is composed of a ferrite core, glued together from parts of my scrap box. The cylinder has an outside diameter of 36mm and an inside diameter of 24mm. The two legs have the dimensions 55x13x5mm. 100 turns of 0.375mm enameled copper wire are wound onto the core. Another piece of ferrite, which is glued to a 4mm threaded rod, is attracted by the electromagnet. This system works more powerfully and is much more energy efficient than the air coil in the first experimental setup - so no fan is required. Example engravingsThe engravings seen here were made with version 2 of my Wagner hammer. The size of the graphic is only 15x16mm.
Material combination: Steel sheet with Tungsten tip 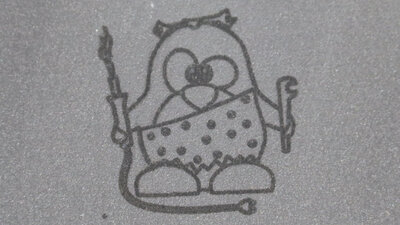
Material combination: Steel sheet with 0.5mm steel wire 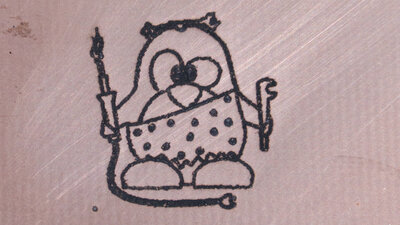
Material combination: Copper plated board with 0.5mm steel wire 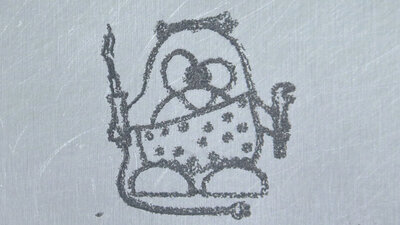
Material combination: Aluminum sheet with 0.75mm copper wire The softest metal with the lowest melting point in my series of experiments is the trickiest. It finally worked with a 0.75mm copper wire and sunflower oil on the workpiece. I also reduced the feedrate to 0.5mm per second. Further experimentation is required to get better results. HomoFaciens CoinsHomoFaciens Coins are made of an engraved steel disc with a diameter of 20mm, so they are slightly smaller than a 5 euro cent coin. The aim is to continually improve the engraving of these discs through experimentation. There are different electrode materials and shapes to be tested, coolants and of course design changes to the Wagner hammer with which the engraving is carried out. So it's time to spend money to buy materials. You can support me financially in my experiments and receive a "coin" like this as a thank you for donations of €15 or more (don't forget to mail me your postal address if you want a coin). After transferring the donation, send me an email with your delivery address. A "coin" that is freshly produced using the best current technology will be sent to you. The metal blanks are not of coin quality, so they have scratches on the surface. Together with the manufacturing method (sparks have a life of their own), each HomoFaciens Coin becomes a unique piece. Thanks for your support!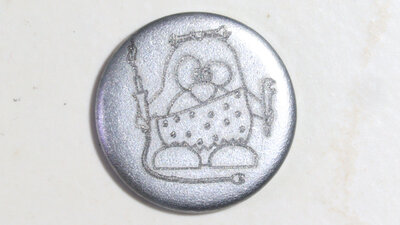
Material combination: Steel disc with 0.3mm Tungsten carbide drill Coolant: Tap water This coin was engraved in the video. When I was looking for durable electrodes with a diameter smaller than the 0.5mm of the steel wire, I only found the 0.3mm drill bits in my craft basement. The shape is of course not optimal due to the cutting edges of the drill, but the result is not bad. The wear on the electrode is not too much. Tap water is sufficient as a coolant, it does not have to be the deionized water used for EDM machines. The conductivity of the coolant only slightly affects the functionality of the Wagner hammer. 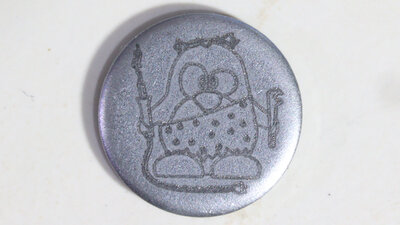
Material combination: Steel disc with 0.2mm Tungsten wire Coolant: Tap water After the video was shot, another order arrived with the 0.2mm tungsten wire. The 0.2mm wire is also sufficiently stable to make engravings with it. The electrode wear is slightly higher than with the steel wire, which is more than twice as thick, and also than with the 0.3mm tungsten carbide drill. However, the tungsten wire is significantly cheaper than the drill and the result is even a little better. 3D filesI have designed the files with OpenSCAD. The scad file as well as all parts as STL files are available as download package. I used PET-G to print the parts.<<< EDM: Electronics (1) EDM: Wagners Hammer (2) >>> News The Project Technology RoboSpatium Contribute Subject index Archives Download Responses Games Links Gadgets Contact Imprint |
|
|